The content of the article
So why are we returning to the good old cast irons? Because such tasty potatoes, meatballs and "grandmother" pancakes in other dishes - can not be achieved. Yes, modern pans are lightweight, comfortable, do not require prior preparation before use, but the taste and benefits of food are still more important.
Cast iron is an alloy of iron and carbon, plus a small amount of additional “additives”. It does not emit toxic substances, such as Teflon, for example, and when used properly it is practically “eternal”. Food from cast-iron cookware is particularly tasty - this is due to the relatively low thermal conductivity of the metal. Cast iron heats up for a long time and evenly and gives off heat just as long, does not “burn” food. And why burn a pan of cast iron, maybe you should not even bother?
Why is the procedure necessary?
In the manufacture of utensils from cast iron, molds are lubricated with a special composition so that the finished product is easily removed. And then, before the sale, they apply a corrosion-resistant coating so that the pan reaches us, not damaged by rust. And all these lubricants must be removed, otherwise we will literally eat them. How this may affect our health is a big question. Moreover, cast iron is a porous alloy and just washing with Fairy is not enough, because lubricant particles will remain in the pores and, when heated, will be transferred to our food.
Removing factory grease
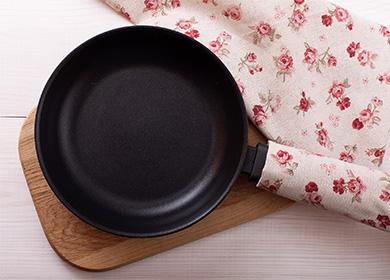
Before starting to calcine, you need to properly prepare the cast-iron grill pan: before the first use, you must first completely remove the factory coating, and then create a new one so that the food does not burn.
To clean the pan of grease will help ordinary salt. If there are traces of rust on the dishes - just wipe them with a metal grater and then follow the instructions. And it consists of nine simple steps.
Procedure
- Wash dishes with any pre-squeak detergent. That is, there should not be a greasy film on the surface.
- Wipe dry.
- Place the pan on a fire to allow the remaining moisture to evaporate completely.
- Pour salt in such an amount that the layer is not thinner than a centimeter.
- Heat the salt, stirring occasionally, until the color changes and it starts to “shoot”.
- Throw out the salt.
- Wash the pan without soap, just under running water.
- Wipe dry.
- Dry to the end on fire.
It is impossible to say exactly how long it takes to calcine a cast-iron pan with salt. It all depends on the size of the dishes and the composition with which it is covered. Pay attention to the color of the pan: as soon as it turned from black to gray and stopped smoking - the goal is achieved.And the salt will “pull out” the grease residues from the pores and change color: from light yellow or grayish to almost black.
3 ways to burn a cast iron skillet in a modern kitchen
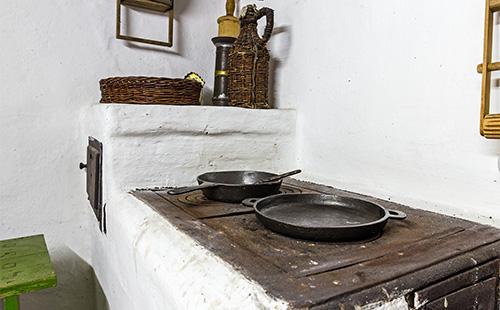
In the old days, cast irons were calcined over an open fire or in stoves. If you do not have the opportunity to harden on the street, then here are three proven ways to prepare a cast-iron frying pan or a cauldron for first use in a city gas apartment.
Option number 1
Features This is a fairly simple and quick way to create a new non-stick layer in the pan. It is better to use refined oil, so there will be less smoke and burning. You can also grease with fat, our grandmothers did just that.
Execution technique
- Grease the prepared pan. It is important to wipe off the excess so that there are no smudges.
- Put on a small fire.
- Calcine for about half an hour.
- Immediately place the pan under a stream of water. Caution: the water will boil and shoot. To avoid burns, put on a mitten-mitten.
- Repeat the procedure you need at least three times.
Option number 2
Features This method will properly burn the cauldron at home. Indeed, on a burner fire it is difficult to achieve uniform heating of high walls and it would be necessary to lay the cauldron on its side and calcine in parts, turning it from time to time.
Execution technique
- Set the oven temperature to about 180-200 ℃.
- Thinly grease the prepared pan or cauldron.
- Do not forget to wipe off the excess, the fat should not drain on the walls and drip.
- Do the same with covers.
- Place on a wire rack or baking sheet upside down.
- If the handle is removable, leave it outside.
- Leave the cookware with lids in the oven for at least an hour.
- Turn off the heat and let the utensils cool on their own.
- Repeat the procedure one or two more times. So the non-stick layer will be more stable.
Option number 3
Features And you can do without hourly calcinations in the oven. But here you will need a lot of vegetable oil. It must be sunflower and refined, otherwise it will be very childish. Olive better not to use.
Execution technique
- Pour oil into a prepared pan. So much so that the layer is at least half the height of the walls. And better - almost to the brim.
- Warm over medium-low heat for at least half an hour.
- Allow the pan to cool.
- Pour out the oil.
- Dry the bowl dry.
Open fire
And how to calcine a cast-iron cauldron before first use, if you bought utensils in the winter or are in the country, where there is no way to burn it on the stove? Or if you have not a gas, but an electric stove? After all, the classic cauldron does not have a flat bottom and it is impossible to install it exactly on the electronic stove. Here the experience of our grandmothers, who burned new cast-iron cauldrons at the stake, like potatoes, will help.
So you can calcine not only the new cauldron, but also other dishes made of cast iron, of any shape and size. You can simply make a fire, or you can use a wood stove type "potbelly stove", then you just need to open the top cover and insert the dishes into the hole.
Procedure
- Kindle firewood.
- If it is a bonfire, simply place the vessel in the center of the fire. If this is a stove, place the utensils in an open doorway from above.
- Wait until the color from black changes to gray and the grease stops smoking.
- Remove the pan from the heat and pour water over it. In winter, you can throw it right in the snowdrift and clean it with snow.
- Wipe dry.
- Pour oil on the bottom and smear it on the walls to the edges.
- Put it on the fire again.
- After half an hour, rinse the dishes again.
- Repeat two to three times.
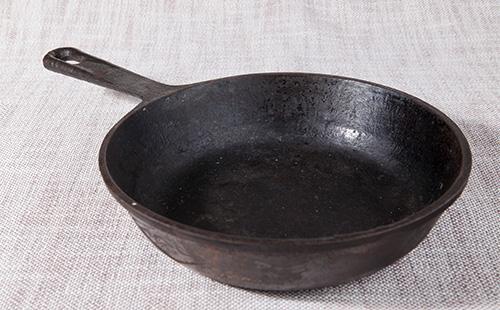
If the items are not new
And if you inherited old cast-iron cookware with a thick layer of soot - do not rush to throw it away, with the right approach, it will serve you for decades. According to the reviews, the old proven method with laundry soap and PVA glue will help to “reanimate” the worn cast iron.
Procedure
- Draw water into a ten-liter pan or bucket, heat.
- Rub a half of the hosiery there and pour one bottle of stationery glue.
- Stir until the soap dissolves.
- Put the cast-iron utensils in the bowl.
- Cook over high heat for two hours. Add water a little, because it will boil.
- Drain the soap solution.
- Cool the dishes under a stream of cool water.
- Brush away carbon deposits with a metal brush.
Well, then we proceed with the vessel, as with a new one. That is, we calcinate with salt, and then - by any of the above methods.
Rules for the maintenance of cast irons
Cast iron utensils are almost eternal. And if you take care of it correctly, then you will enjoy healthy dishes “like from the stove”, and not complain to those around you that “everything sticks to the bottom”. Meanwhile, the operating rules are quite simple.
- Do not wash with soap. Otherwise, destroy the oil layer. After cooking, simply wash the pan with plain water and wipe dry. Do not forget to finally dry it on fire.
- Do not leave food in the dishes. After cooking, you need to transfer the dish to another dish. Acids from food will easily destroy the oil layer and cast iron will have to be calcined again. In addition, there is a risk that the metal will rust.
- Do not use metal spatulas. It is better if it is wooden or silicone items. Otherwise, you will damage the oil layer and it will have to be restored.
- Do not wash dishes while it is hot. Let it cool, otherwise the pores do not have time to close and part of the non-stick coating is simply washed off.
- Do not soak. The dishes will rust. If the food has sunk, just add water and boil it. After that, the remnants of food are easily washed off with water.
- Do not wash in a dishwasher. Prolonged contact with water and detergent will lead to corrosion.
Popular methods of how to process a cast-iron frying pan before first use are time-tested and always “work” if everything is done correctly. And another point - high-quality cast iron can not be cheap. If you are trying to sell a “great skillet” at a cheap price, do not try illusions, this is a fake that even repeated calcination will not save.
Hostess reviews
I also like cast-iron frying pans - they are easy to clean, durable, and do their job very well ... modern frying pans are all designed for a short life ... even with the most careful handling, they change and the products begin to stick to it over time ... I give preference to the old to cast-iron “grandmothers” ... And I look after them like this: a new cast-iron frying pan or pan, to which something began to stick to (I had it after washing with liquid detergents), calcine on a fire with salt (not with Scrap): on a dry frying pan rolling in a tablespoon of salt, rub a little salt hand, put over medium heat for 15 minutes ... and then a dry cloth smacks of salt and carefully wipe the pan ....everything, the pan is ready for use ...
washing it with very hot water and a simple sponge ... if something is fried (this can happen if I heat something without oil ... porridge, for example), just pour it into a frying pan, put it on a fire and bring the water to a boil ... all that attached, perfectly washed after that, again with hot water and a sponge .... after washing with oil I do not smear, but just put it on the fire for a minute, the pan just needs to dry ... and that's it ...Enola http://povary.ru/forum/?showtopic=1465
On the dishes that I use constantly - I always do this after washing
the one that is rarely used (for example, a pilfer cauldron for the street) - there I’ll only dry it very carefully. because had experience - the applied oil has grown old, has gained a smell and has become so rubbery-sticky. the cauldron had to be “cooked” again, fired, formed a coating, and further down the list.Vorlock, https://honda.org.ua/forum/about63260-0-asc-50.html
Food cannot be stored in uncoated cast iron dishes. Of course, it will rust and spoil the food. Soviet cast iron also rusts, it was just longer in use and therefore better oiled. It can take about a year of regular and frequent use to “refine” the pan. You just need to be patient, and then the new cast-iron skillet will gradually become "old and beloved, not something-present."
Guest, http://www.woman.ru/home/medley9/thread/4146307/
I bought, not a frying pan, though, a cauldron, but also cast-iron. If I knew how much trouble would be with him, I would never have taken it. In the memo to him it was written that it was “in a special anti-corrosion treatment”, so it must be cleaned before use, then greased the entire cauldron with vegetable oil and calcined. and so several times. Cooked food can not be stored in it at all - from experience it is not something to store, even leave for several hours and it’s not worth it. After cooking, thoroughly wash and wash (this, of course, by itself), then wipe dry, and again from experience I’ll say that it’s not enough just to dry, it’s also necessary to calcine. Well, and most importantly, the operation of coating with oil soot should be repeated from time to time. Kapets, in short. I will not answer anyone
SOUTH_MORE https://www.u-mama.ru/forum/family/housewife/413792/index.html#mid_10445557
