The content of the article
Shellac is applied using the same technique as other gel polishes. But it is not dried in air, but under a special ultraviolet lamp. The palette of shades is very large, which allows masters to implement a variety of design ideas. Gel polish is suitable for both manicure and pedicure. Unlike other products, you can “walk” with it without frequent interruptions.
How to remove shellac at home: removal techniques
To learn how to remove shellac from nails at home, you need to look at the work of professional nail masters. In their practice, they use the following tools:
- special liquid for dissolving the coating;
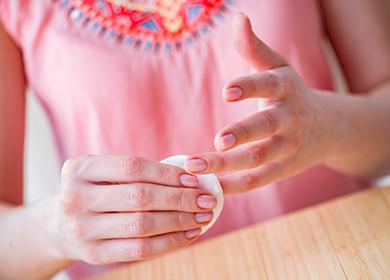
- disposable wipes for removing manicure (sponge bags);
- orange tree sticks;
- nail files;
- hand care products, cuticles.
This whole set can be replaced with improvised items. Instead of a special liquid, an acetone-based agent is used. The orange stick is replaced with a bamboo or pusher (a metal tool for working with cuticles). Pusher is usually found even in the most modest manicure sets. To remove shellac yourself, it is not necessary to have disposable sponge bags. They are easily replaced with regular cotton pads. To process the coating of the nail, almost any nail files that are available are suitable.
Using foil
Features. Before you erase shellac at home, you must first test the solvent. Apply a small amount of liquid to the skin and wait 20-30 minutes. The presence of external manifestations in the form of irritation, redness will indicate an allergic reaction.
Procedure
- Cut the cotton pads in half. In total, ten pieces should be obtained.
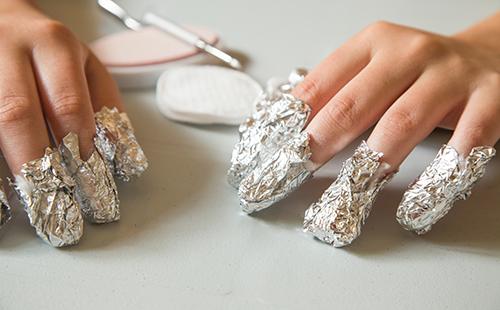
- We prepare the foil rectangles. They should be so large that one finger can be wrapped.
- Wet each piece of the disk in a special solvent for acetone gel polish. Apply to the nail and wrap with foil.
- We wait 10-15 minutes.
- Remove the “caps” from the nails in the sequence in which they were worn.
- Carefully remove the "lagging" varnish with a bamboo stick or pusher.
- After removing the coating, the nail plate may have an uneven surface, so grinding is needed. We perform it with a buff file.
Acetone
Features. This method, unlike the first, is a bit simpler and faster, but less sparing. To remove shellac without a special liquid, which is used by professionals, you can use acetone.During the procedure, you can observe how the varnish will “go off” and control the entire process.
Procedure
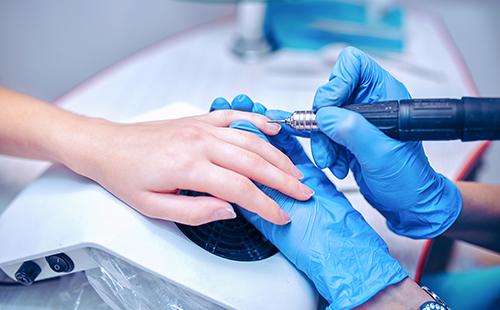
- If there is a tool with a milling cutter, then we cut off with it a top coating applied for fixing. In the absence of such, we use a regular file for polishing nails.
- We select two containers so that one of them fits into the other. We pour hot water into the larger one, acetone into the smaller one. Immerse the container with acetone in heated water.
- We spread our hands with a nourishing cream.
- Dip your fingertips into the solvent after it has warmed up in a water bath. Hold no more than 20 minutes.
- After the coating softens, remove it with a bamboo stick or pusher.
- If the remnants of the varnish do not wear off on the nails, then put on these places pieces of cotton pads soaked in acetone. We are waiting for a couple of minutes.
- Rinse your hands and moisturize with care products.
Tips for maintaining the health and beauty of nails
After treatment, the nails may become weak and thin and need special care. Nail plates can be restored using affordable means in several stages.
- Nutrition and hydration. Coconut or olive oil. Nails need to be lowered into a heated product for several minutes. Then they get wet with paper towels. You need to wait until the remaining oil is absorbed. A cosmetic procedure is carried out every other day to enhance the effect.
- Whitening. After treatment with solvent, the nails may become yellowish. You can lighten them with lemon juice. In the pulp of citrus you need to immerse your fingertips for three to five minutes.
- Strengthening. Baths based on sea salt and essential oils.
Coating Care Tips
To keep shellac longer, it is better to try not to wet your hands after a manicure or to do it very rarely, use gloves when washing dishes. Fans of "long-playing" nail polish in their reviews give three more recommendations.
- If the nails are a little grown. And an unpainted space appeared at the beginning of the plate, then the usual fixing varnish or acrylic powder is applied to the coating - the products will provide an attractive appearance and hide defects.
- If the coating starts to “move away” along the edges. So, you need to apply the same topcoat on top.
- If the nails are too long. But the coating has not deteriorated, then they can be processed with a buff file to the desired size.
To remove shellac from the grown nails in the same way as with ordinary ones will not be entirely correct. It is impossible to get rid of it with a “compress” or a bath of solvent. Acetone-containing products can ruin or even dissolve artificial nails. There are only two ways to remove shellac at home from false nails - with a milling cutter or a nail file. To work with the first device, you must have skills, otherwise you can injure your fingers. The second option is safer. A file of high rigidity is suitable for it. The procedure itself is quite lengthy.
Reviews: "Acetone is a great force, only for nails is not" ice ""
In fact, it’s better to entrust the manicure master to this business. If you can’t wait, then you need to arm yourself with foil and a special means for removing the coating. Buy at a professional cosmetics store. Well, then moisten the swab with a tool, put it on your finger and wrap it with foil. You leave for 15-20 minutes. And you're done! Shellac should easily move away without damaging the nail plate. Buy another wooden stick for this.
Anya, http://www.divomix.com/forum/kak-snyat-shellak-v-domashnix-usloviyax/
Acetone is a great force, only ice is not for nails. but from once, if a hopeless situation does not die :-) by technology both in the cabin, on cotton wool and foil. a couple of minutes and everything is well removed with a stick.
LeSu, http://vladmama.ru/forum/viewtopic.php?f=1093&t=178943
