Kitchen appliances and utensils:
- a set of containers of different depths;
- tablespoon;
- tea spoon;
- mixer;
- baking dish;
- parchment paper;
- small pan / ladle;
- cutting board;
- serving dish;
- sieve;
- whisk;
- food wrap.
Ingredients
| Flour | 150 g |
| Cocoa powder | 100 g |
| Baking powder | 1 tsp |
| Baking soda | ⅓ tsp |
| Eggs | 2 pcs. |
| Sugar | 280 g |
| Salt | 1 pinch |
| Vegetable oil | 100 ml |
| Sour cream 20% fat | 315 g |
| Condensed milk | 200 ml |
| Chocolate | 120 g |
| Starch | 1 tbsp. l |
| Powdered sugar | 2-3 tbsp. l |
| Gelatin | 1 tsp |
| Milk | 280 ml |
| Cherry | 300 g |
| Butter | 1 tbsp. l |
Step cooking
Biscuit
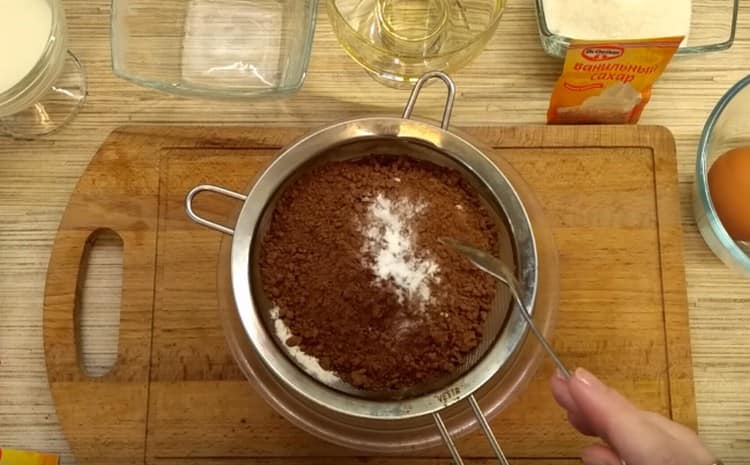
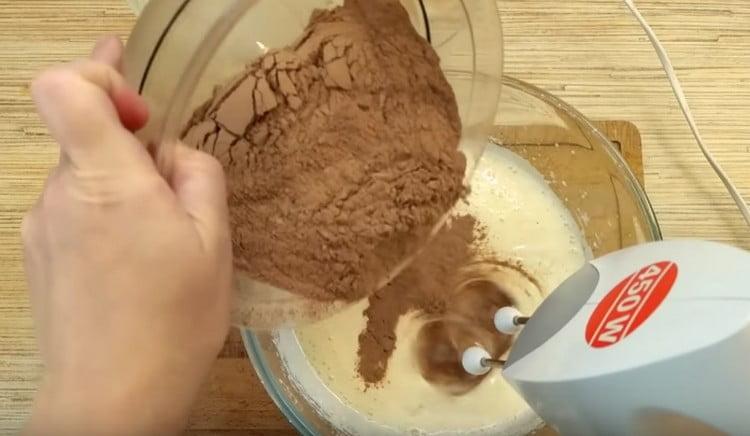
- Sift 150 g of flour, 50 g of cocoa powder, a baking powder for dough and soda into a separate bowl and mix with a whisk until smooth.

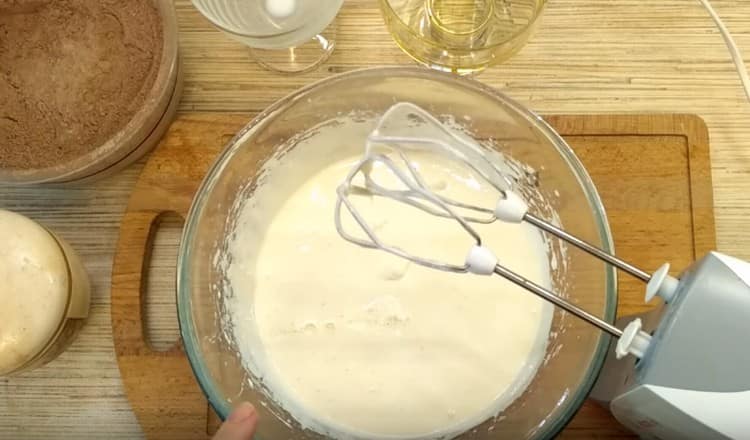
- Drive 2 large chicken eggs into another bowl, add a pinch of salt and approximately 180 g of sugar. Beat the mixer for 7 minutes at high speed, it is recommended that you even set a timer.
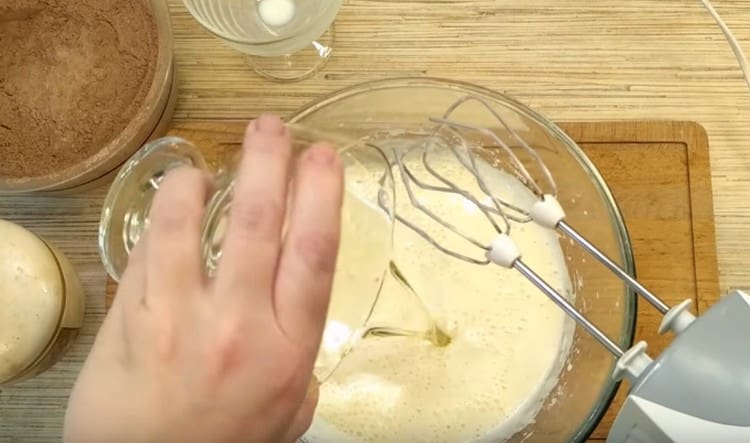
- After whipping, add 120 ml of milk to the resulting lush white mass and stir until smooth, then pour in 100 ml of vegetable oil and also mix.
- Quickly pour the dry mixture into the resulting mass and mix with a mixer at slow speed with a spoon or a whisk.
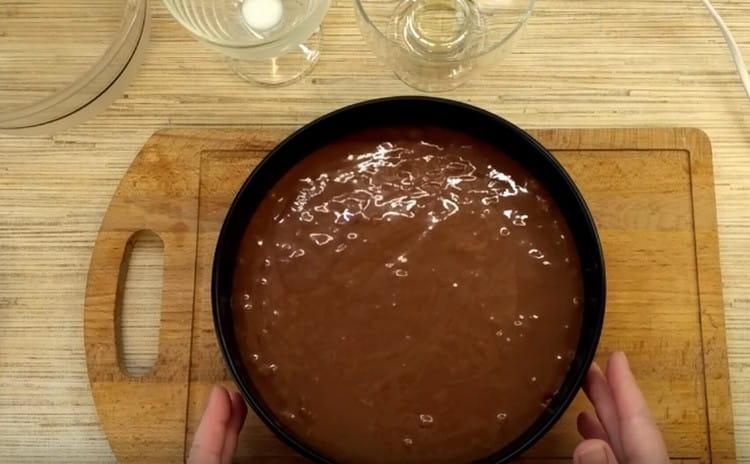
- Pour the chocolate dough into a baking dish covered with parchment paper (the ingredients are designed for 22 cm in diameter) and send it to the oven preheated to 180 ° C for 30-40 minutes.
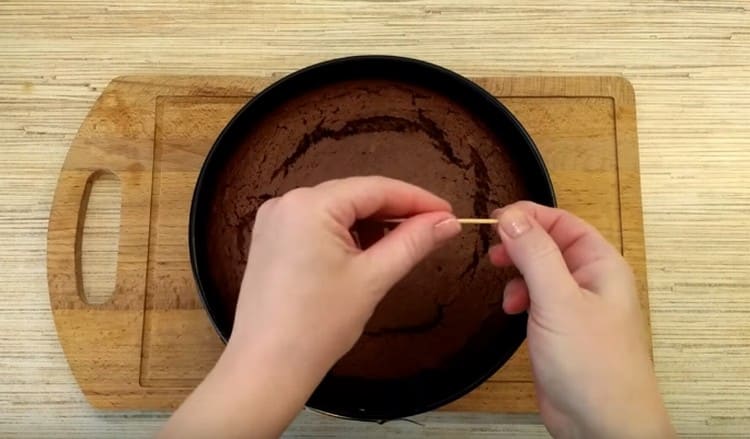
- You can check the readiness with a wooden stick: it should come out of the finished biscuit without traces of dough.
- It is recommended to wrap the finished cooled biscuit in a cling film and put in the refrigerator for a couple of hours. So it will acquire a structure convenient for creating a cake and will not crumble. If time is running out, you can also put a biscuit in the freezer for 30-40 minutes.

Important! So that the cake does not donkey, it must be hot, not removed from the mold, turned over to the wire rack and allowed to cool, and only then remove and carefully remove the parchment paper.
Cream
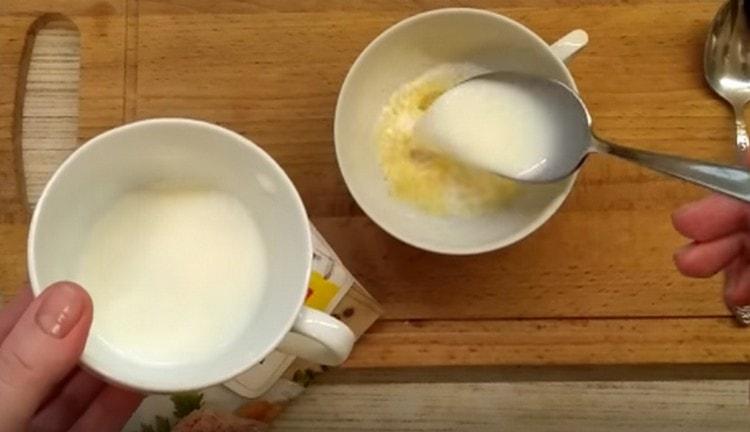
- To 1 tsp. gelatin add 3 tbsp. l milk or water and leave to swell for the time indicated on the package.
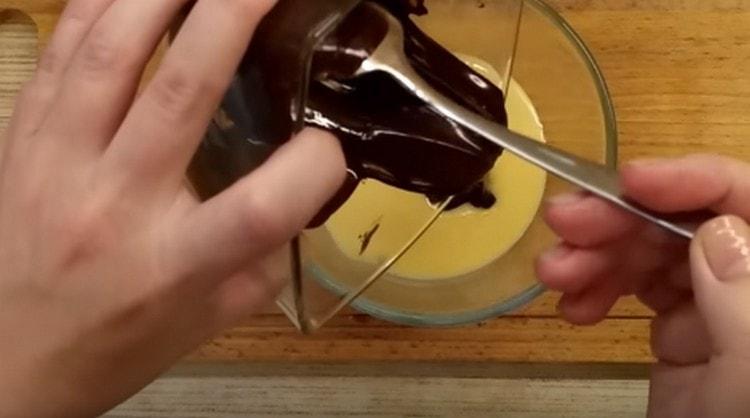
- Melt 120 g of dark or milk chocolate in a water bath or microwave and combine with 200 ml of condensed milk, mix well and put in the refrigerator for 20 minutes.
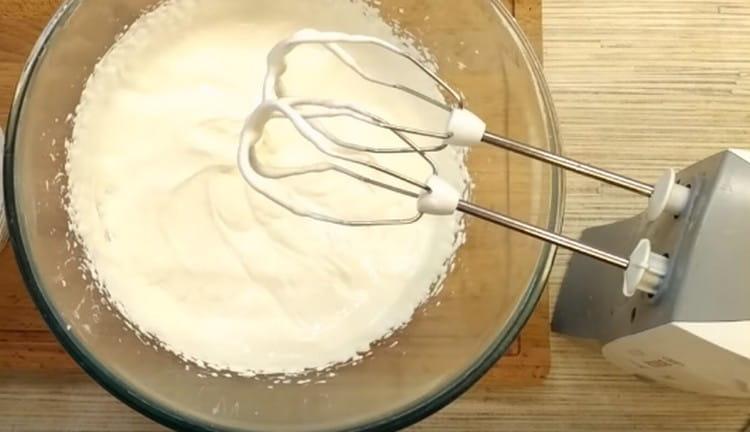
- Pre-cool 315 g of 20% sour cream, pour into a deep container and beat with a mixer.
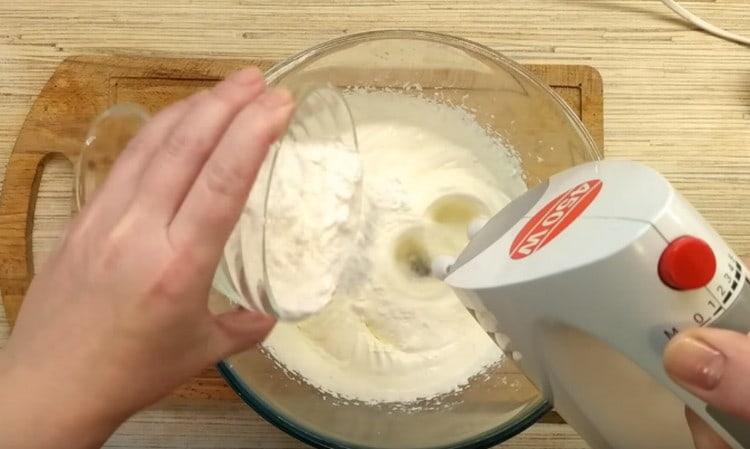
- We thicken it with a mixture of 2 tbsp. l powdered sugar and 1 tbsp. l starch, which we gradually introduce and stir. After that, beat the mass for 5 minutes.
- From the refrigerator we take the condensed milk with chocolate and gradually add to the sour cream and mix thoroughly.
- We dilute gelatin (but in no case bring it to a boil!) In a water bath, let it cool slightly, put it into the cream and mix with a mixer at low speeds.
- Put the finished cream in the refrigerator for 10-15 minutes.


Did you know? For thickening sour cream, it is best to use corn starch, because it does not leave a specific taste in the finished dish, but potato is also not forbidden.
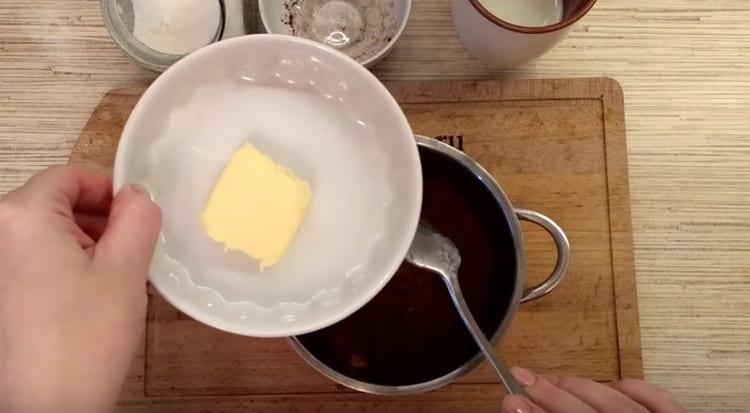
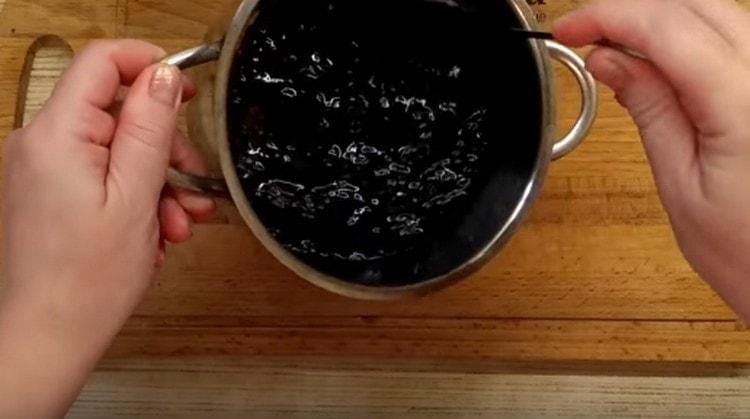
Chocolate fudge
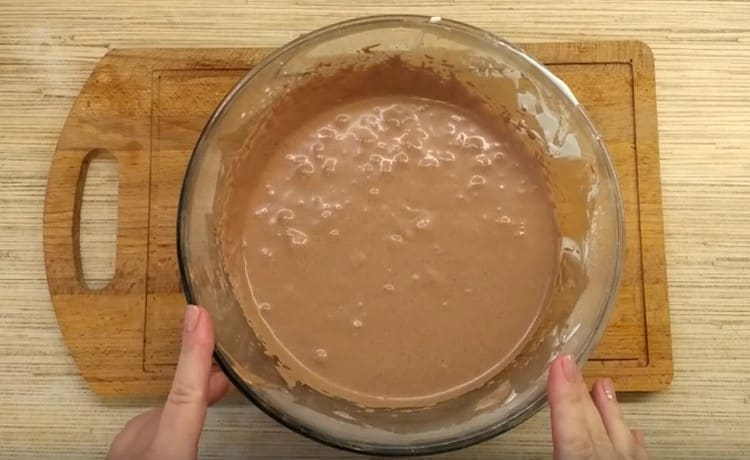
- Pour 4 tbsp into the bucket. l sugar, 2 tbsp. l cocoa powder, 4-5 tbsp. l milk and 1 tbsp. l butter.
- We put on the fire, wait for the complete dissolution of the ingredients and let the sweets boil for 2-3 minutes. Removing from the heat, cool the mixture a little. It should be uniform and viscous.
Making a cake
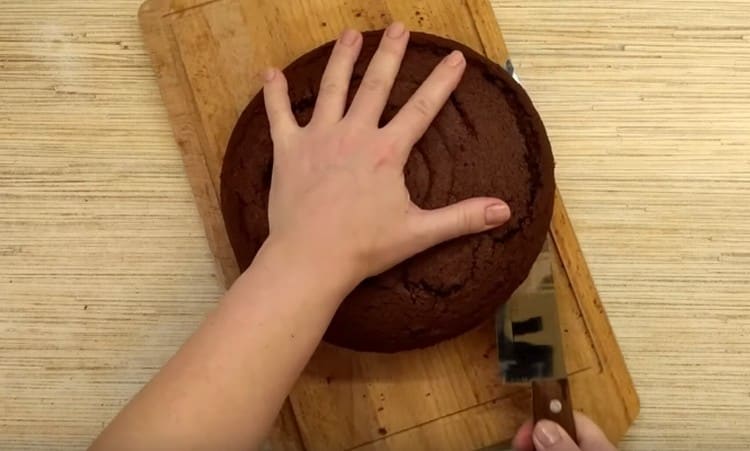
- We take out the biscuit from the refrigerator, free it from the cling film and divide along 3 cake layers.
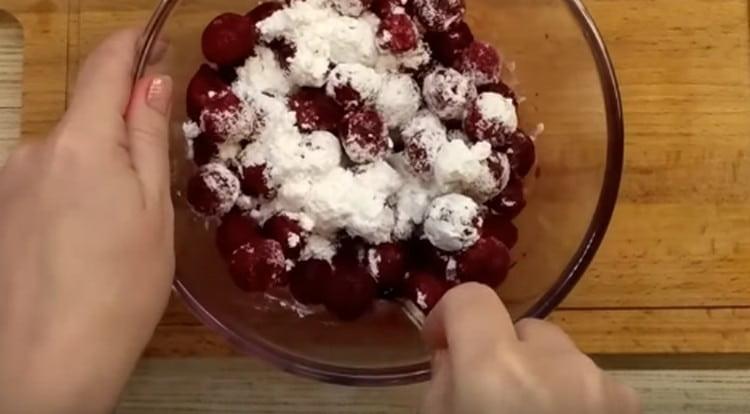
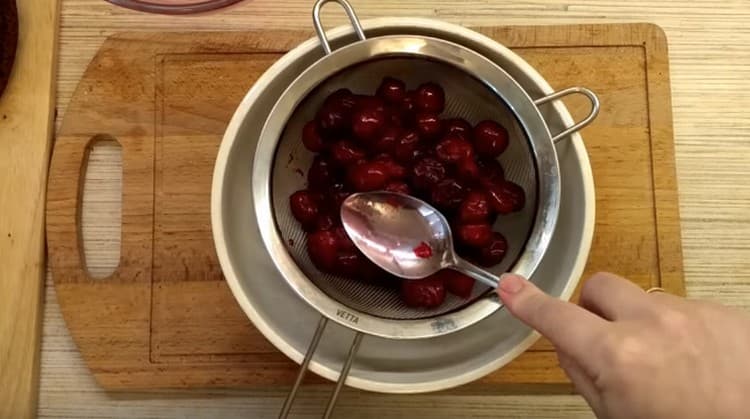
- We fill the frozen cherry with 2 tbsp. l icing sugar and let it stand to defrost and let the juice flow; You can use the microwave to speed up the process. If you use fresh cherries, then it needs to be boiled with sugar for several minutes so that the berries let the juice go.
- We filter the cherry juice through a sieve and, if necessary, add sugar to it to make a syrup.
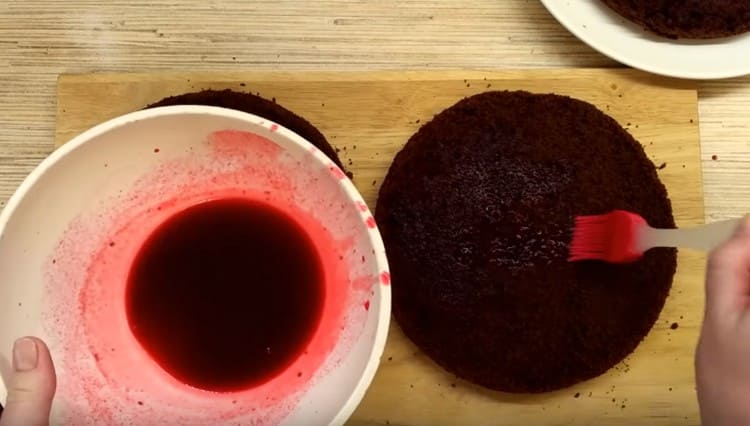
- Soak each syrup in syrup in average quantity.
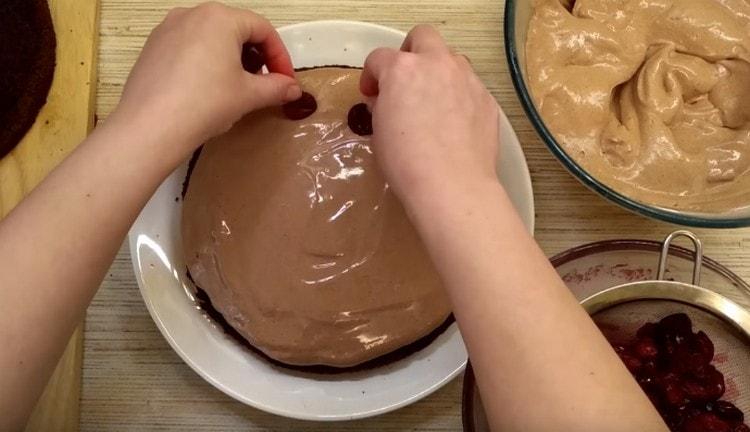
- We spread the first cake on a serving dish and generously grease with a thickened cream and sprinkle with cherry berries, gently squeezing them into the cream.
- Repeat the procedure for the second cake and cover it with the third.
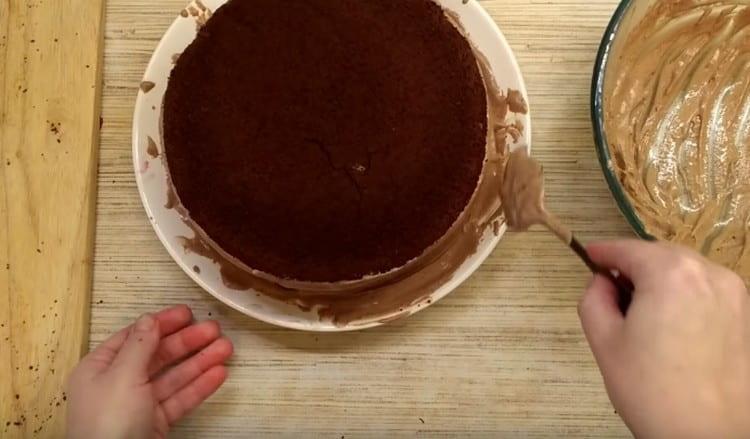
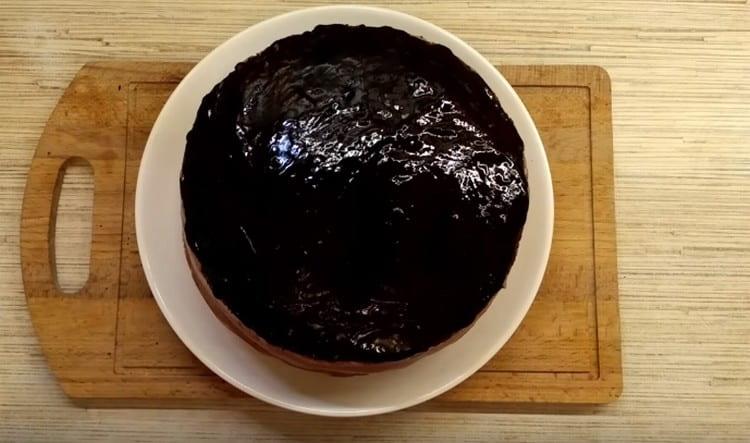
- If a little cream is left, grease the side surface of the cake with it.
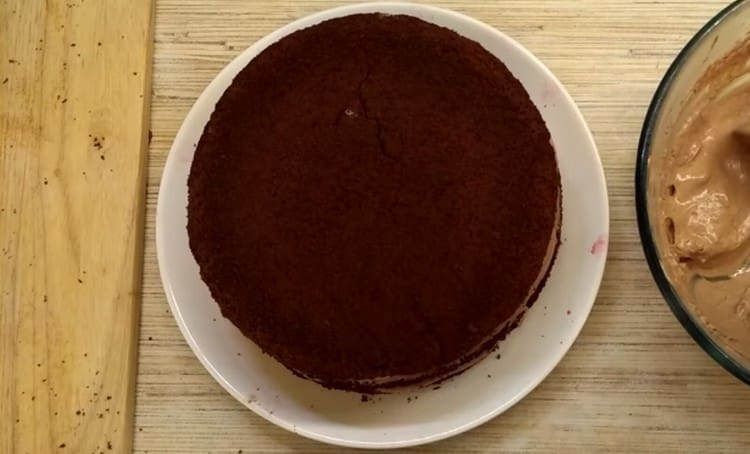
- We cover the top with chocolate fudge, after which we send the cake in the refrigerator for 1-2 hours, so that the fudge is completely frozen, and the cakes are saturated with cherry juice and cream. The cake is ready!
Video recipe
You can also watch how this cake is prepared on a video in which all the stages of preparation are demonstrated.
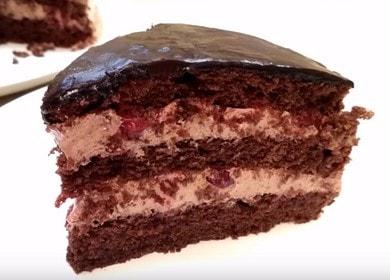
Looking at this cake, you think that a beautiful picture from the supermarket went straight to your plate ... But now this is not a dream, but a reality, because you can make this incredibly beautiful, tasty and fragrant chocolate cake with your own hands to the delight of households and guests. Tell us, did you have experience in making chocolate cakes? What ingredients did you add there? Write about this in the comments. Also write if you want to praise, criticize or supplement the recipe. Thank you for your attention, enjoy your meal!
Other cake recipes
Cake made of cookies Fish without baking
Carrot cake in a slow cooker
Carrot cake
Quiche honey sponge cake
Sponge Cake with Sour Cream
Carrot cake in a slow cooker
Carrot cake
Quiche honey sponge cake
Sponge Cake with Sour Cream
Enjoy your meal!
