Kitchen appliances and utensils: a bowl for kneading dough, a kitchen spoon, a microwave, a sieve, an oven, a whisk.
Ingredients
| wheat flour | 650-700 g |
| chicken egg | 2 pcs. |
| milk | 200 ml |
| butter | 30 g |
| granulated sugar | 35 g |
| dry yeast | 15-20 g |
| salt | 1 tsp |
| vegetable oil | 1 tbsp. l |
Step cooking
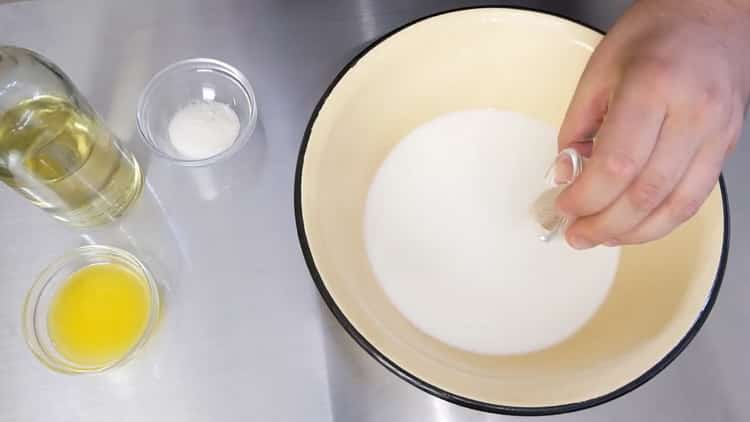
- In a microwave, we heat 200 ml of milk to body temperature, pour into a medium-sized bowl in which we will knead the dough. In the same bowl we place 15-20 grams of dry yeast, mix with a whisk.

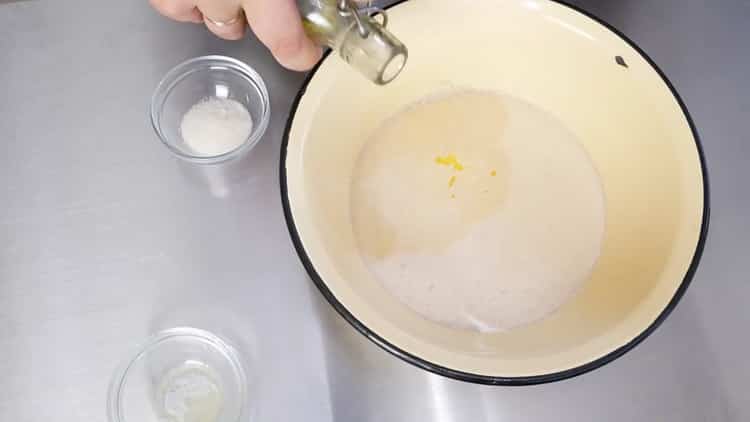
- Place butter in an amount of 30 grams in a microwave, turn it on for literally thirty seconds to allow the butter to melt. Pour it into a container with milk and yeast.
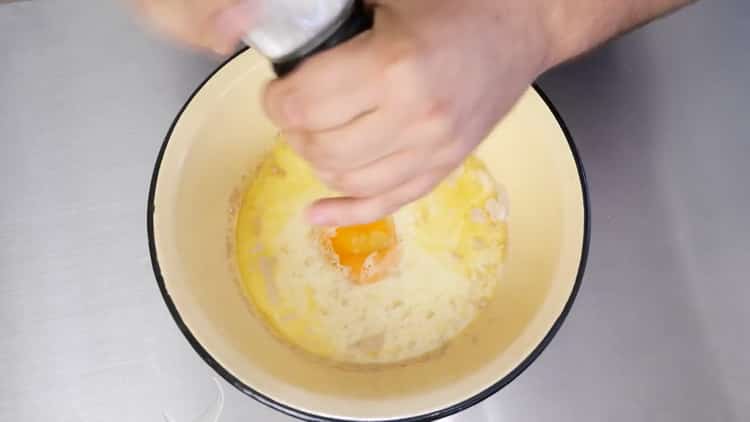
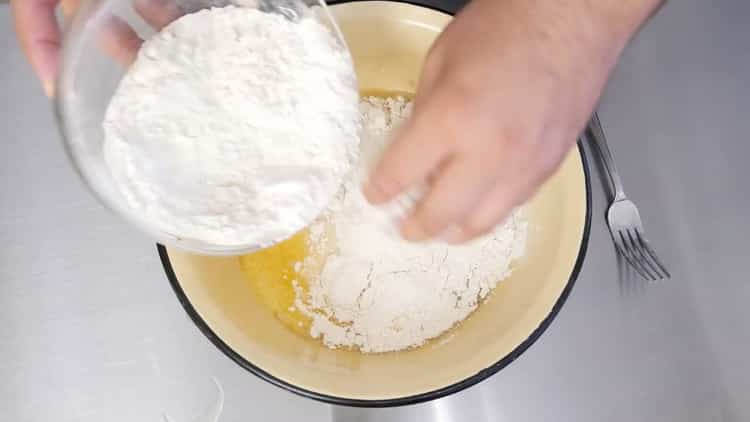
- Here we pour one tablespoon of granulated sugar, a teaspoon of salt. In a separate bowl, break two chicken eggs, beat them with a fork a little, then send them to a mixture of milk, yeast and sugar. All this is thoroughly mixed with a whisk to get a homogeneous mass as possible. Lastly, add one tablespoon of vegetable oil to the bowl.
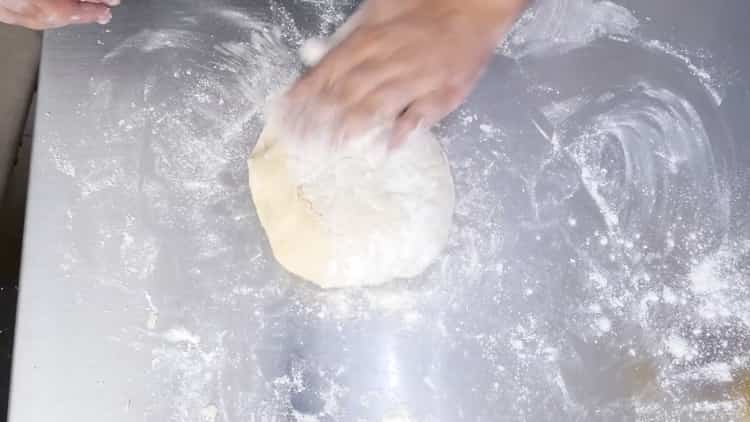
- Now we sift 650 grams of wheat flour through a sieve. Add the flour to the resulting mixture gradually, in parts, knead the dough first with just a kitchen spoon, and then put it on the table. We continue to knead the dough until soft, smooth, if necessary, add more flour.
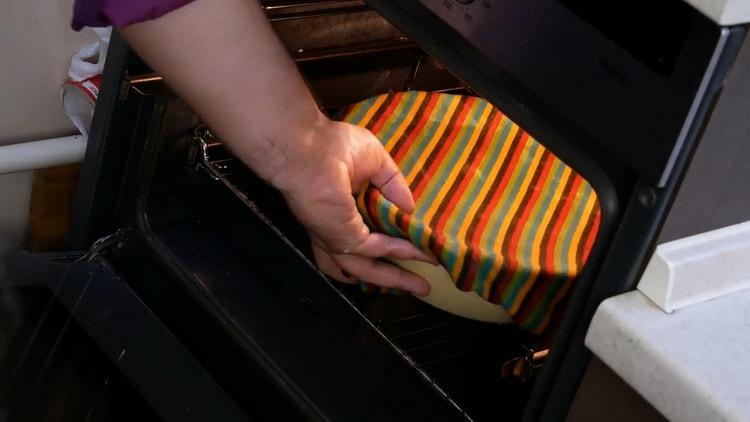
- The dough should turn out soft, but elastic enough. When we get such a consistency of the dough, we roll it into the shape of a ball, put it in a container, cover it with a wet towel or cling film.
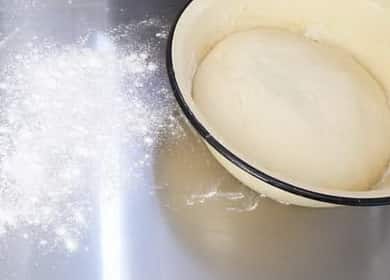
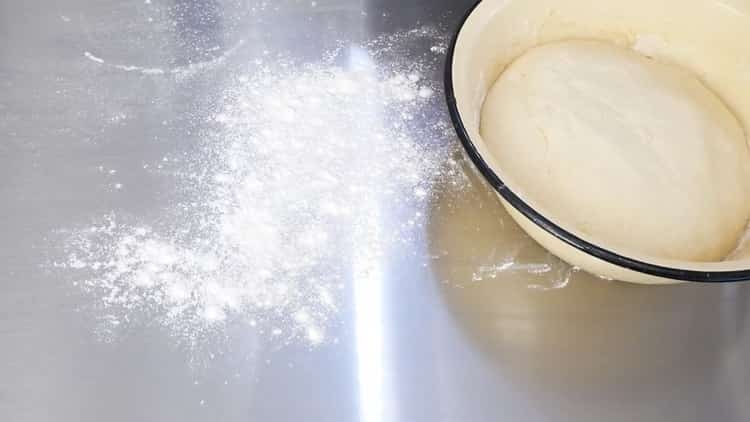
- We send it to a warm, draft-free place for about one hour. The product should increase during this time by two to three times. If there is no such place, the dough can be sent to the oven with the light on.
- After one hour, we take out the dough from the oven, sprinkle flour on the kitchen table, mix the dough again - now it is ready for use.
Useful Tips
- When preparing the dough for echpochmaks, adding dried yeast to warm milk, you can give them some time to make them work, or you can immediately add all the ingredients and knead the dough.
- You should not pour very hot melted butter directly onto the yeast - they will lose their quality, stop fermenting, the dough will not rise.
- When buying dry yeast, pay attention to the expiration dates of this ingredient, do not buy or use expired ones - this will negatively affect the test.
- This dough is used for baking Tatar echpochmakov. The filling for them is prepared from beef cut into small squares, raw potatoes and onions.
Video recipe
This video will introduce you to the detailed process of making dough for such a Tatar product as echpochmaki. Get a list and the number of ingredients used for the test, and also see the immediate preparation of the products themselves.
Dear readers, Tatar cuisine has long been famous for its flour products with meat filling. Have you tried to bake echpochmaki from the test, the recipe of which is described in the article? If you have been able to cook such products for a long time, share your secrets of making dough for them.
