
Kitchen appliances and utensils
- fridge;
- round form for the test with a diameter of 17 cm;
- string for cutting cakes;
- bowls;
- scapula;
- brush;
- knife;
- 4 cambrica;
- mixer;
- a cup;
- 2 toothpicks;
- rolling pin;
- disposable pastry bag;
- nozzle "grass".
Ingredients
- Vanilla sponge cake 28x23 cm in size - 1 pc.
- Curd cream - 1.5 kg
- Canned Peaches - 1 Bank
- Canned Pineapples - 1 Bank
- Round vanilla biscuit with a diameter of 17 cm - 1 pc.
- Round chocolate sponge cake with a diameter of 17 cm - 1 pc.
- Dark chocolate 72% - 300 g
- Butter - 550 g
- Squirrels - 5 pcs.
- Sugar - 150 g
- Citric Acid - A Pinch
- Cream cheese - 1 tbsp. l
- Pink mastic - 100 g
- White mastic - 50 g
- Black mastic - 50 g
- Gel dye red - a few drops
- Gel dye black - a few drops
- Gel dye - 1 drop
Step cooking
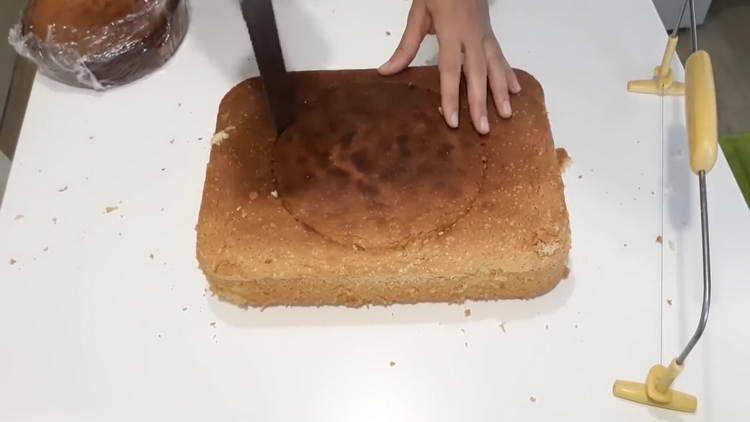
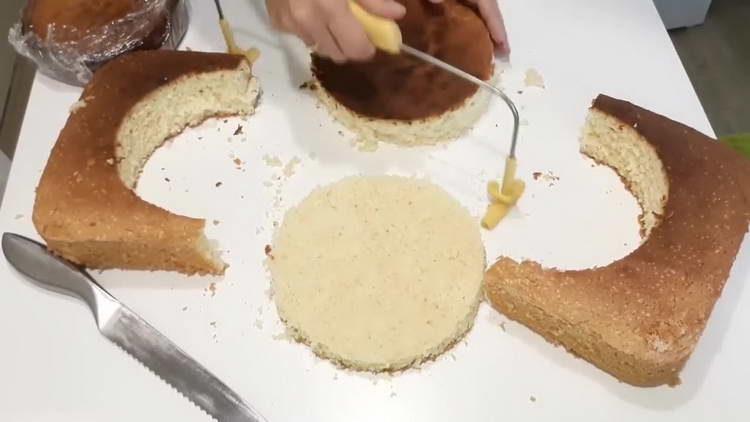
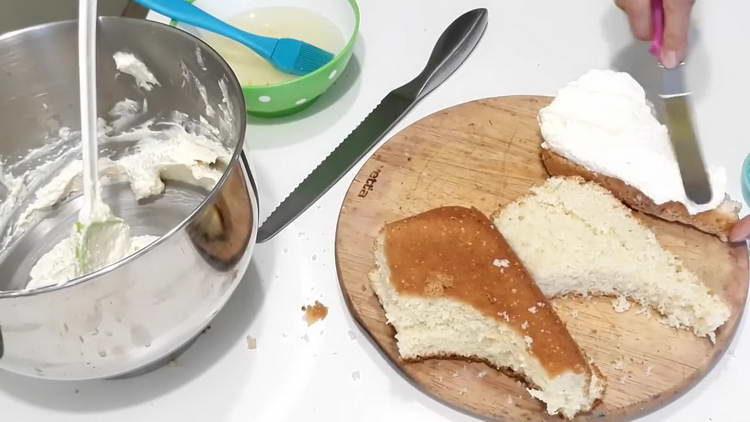
- From a vanilla biscuit measuring 28x23 cm, using a mold, cut out a circle with a diameter of 17 centimeters.
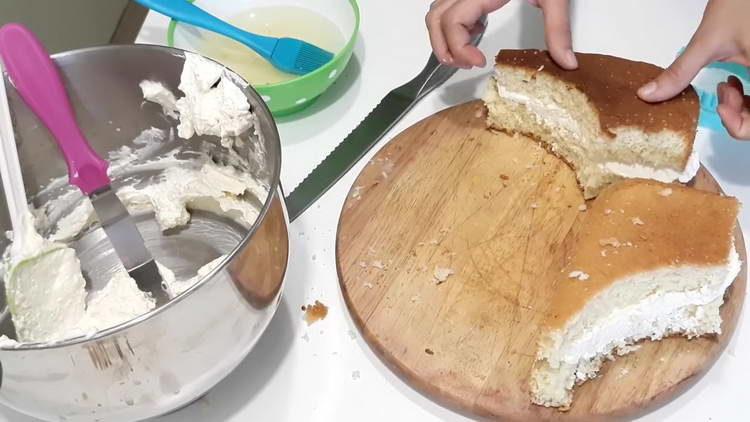
- Using a string, cut it into 3 equal parts. Round vanilla biscuit with a diameter of 17 cm is also cut into 3 parts.
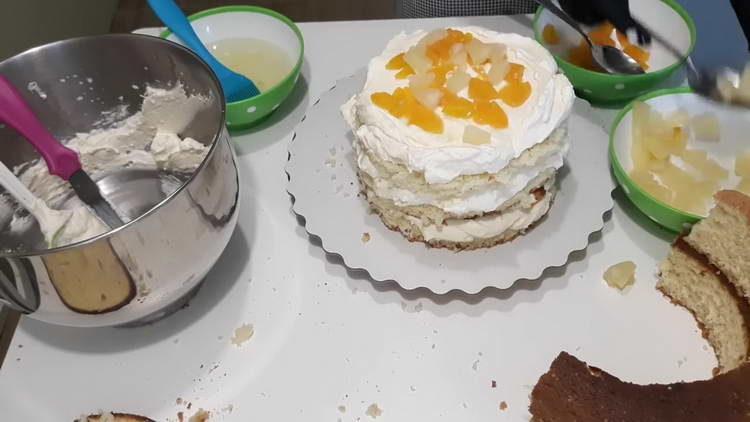
- In separate bowls, strain 1 can of canned peaches and 1 can of canned pineapples. Mix the drained juice and make an impregnation out of it. On the form we spread the first layer of biscuit. Lubricate it with impregnation.
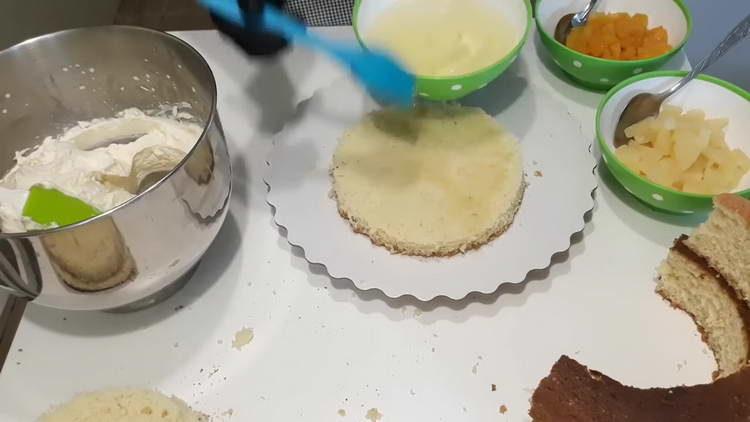
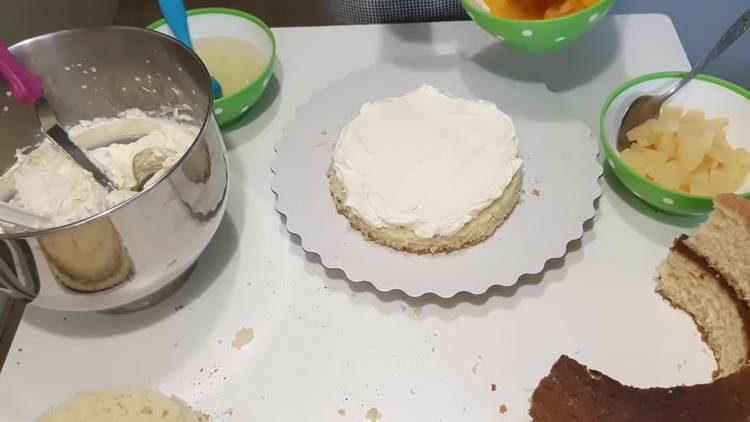
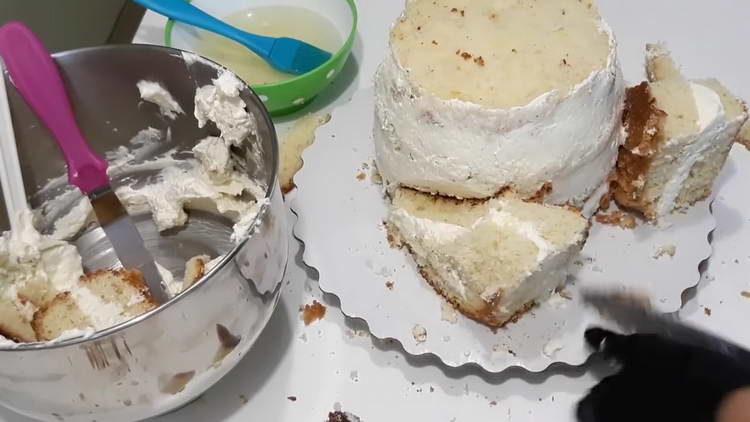
- We put a layer of curd cream on it. In total, 1.5 kg of curd cream will go to the cake. Level it with a spatula. Then we spread part of the canned peaches and canned pineapples, evenly distributing them across the cake.
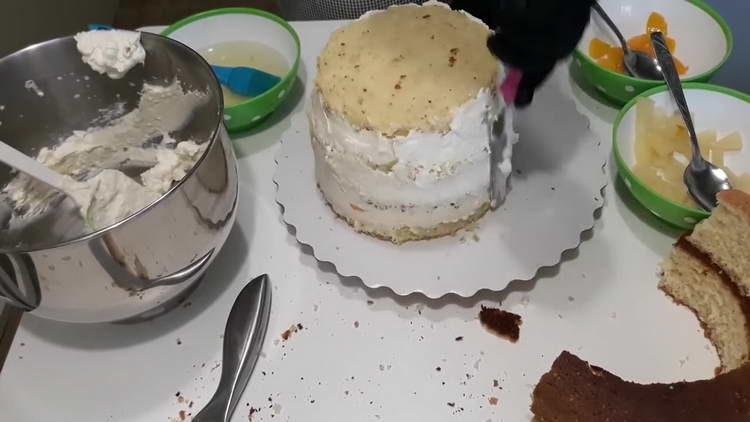
- Next, put the next cake on top, continue. In total, we use 4 cakes: 3, cut from a rectangular biscuit, and one from round.
- Lubricate the resulting lower tier with curd cream on all sides and put in the refrigerator for several hours to stabilize.
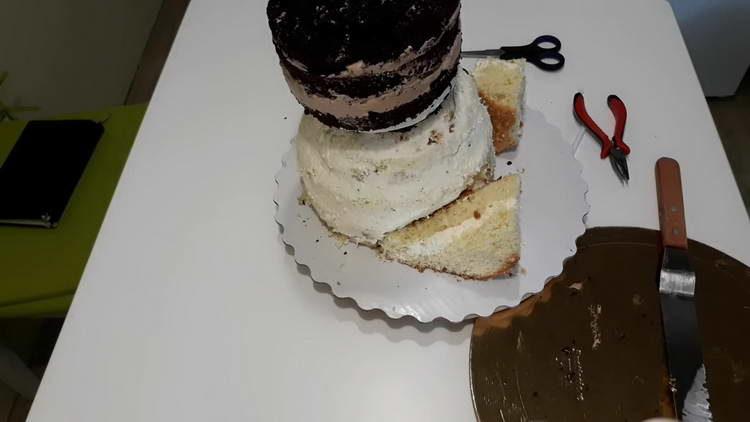
- We draw what our bear will be in the end. And now, focusing on this picture, we cut out the legs from that part of the rectangular biscuit that we have left. We also cut them in half and coat with curd cream.
- We attach the legs to the body and cut off all the excess, focusing on the picture. To make the legs better adhere to the body, we make a cut in the body where we insert the legs.
- Also from the remnants of a biscuit we form paws (on top more refined, on the bottom thicker).
- We cut round chocolate sponge cake with a diameter of 17 cm with a fishing line into 4 cakes. We form the head from them, cutting circles with a diameter of 13 to 15 cm. Moreover, when assembling, put the smallest cake on the bottom, grease it with curd cream, put the next cake and so on.
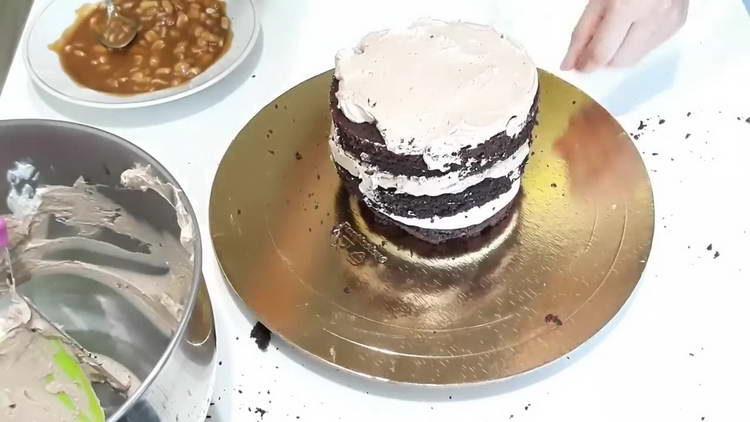
- In order that the head does not move out of the cake, you need to properly strengthen everything. For this, we use 4 cambrics: in the center along the length (5-6 cm above the body), and at the edges we recess deeper.

- After combining 2 tiers, we send the cake to the refrigerator for at least 3 hours, so that it shrinks and stabilizes.
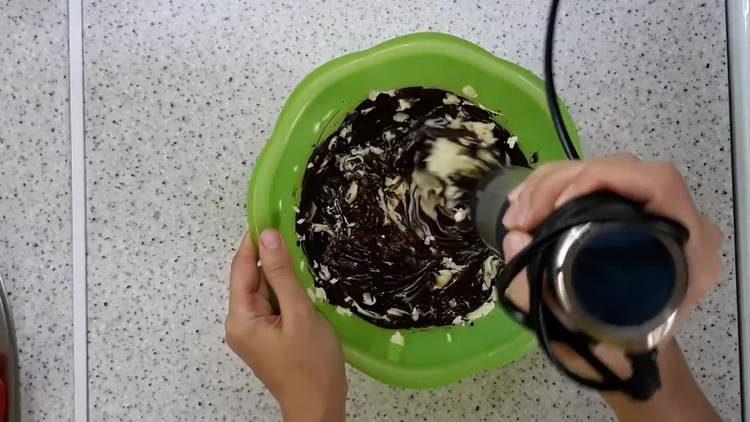
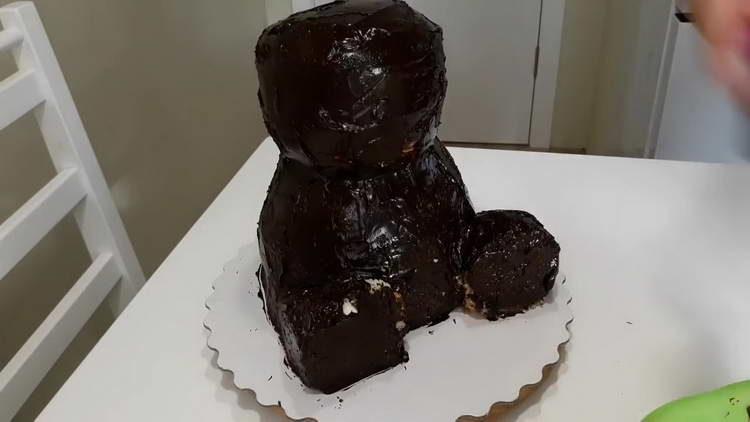
- After this time, we coat the cake with strong ganache on bitter chocolate. To prepare it, melt 300 g of dark chocolate and mix it with 150 g of softened butter. Beat with a mixer.
- Immediately after cooking the ganache, cover it with a chilled cake. We pay special attention to the junction zone of the upper and lower tiers, because this is the weakest place in the cake. Ganache freezes right before our eyes, making the cake more stable.We remove the cake in the refrigerator for 10-20 minutes until the ganache is completely frozen.
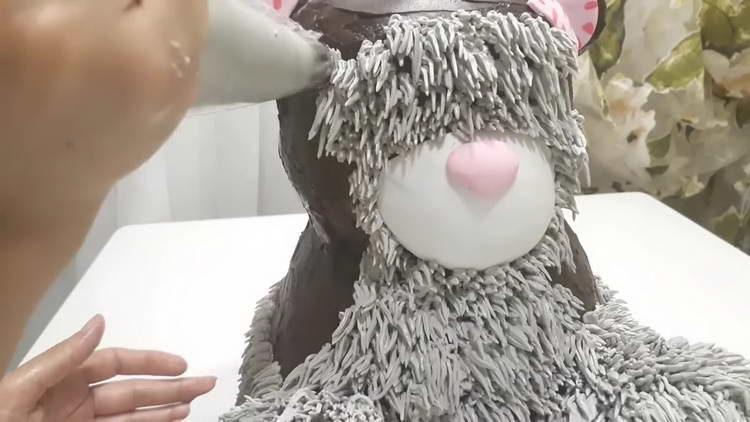
- To create the protruding parts of the muzzle, use the remains of the chocolate biscuit. We put their cup and knead with 1 tablespoon of cream cheese to the state of plasticine. Focusing on the bear’s pattern, we form the muzzle and ears of the size that we need. We apply to the head and press the edges well. To keep the ears well, we attach to the toothpicks.
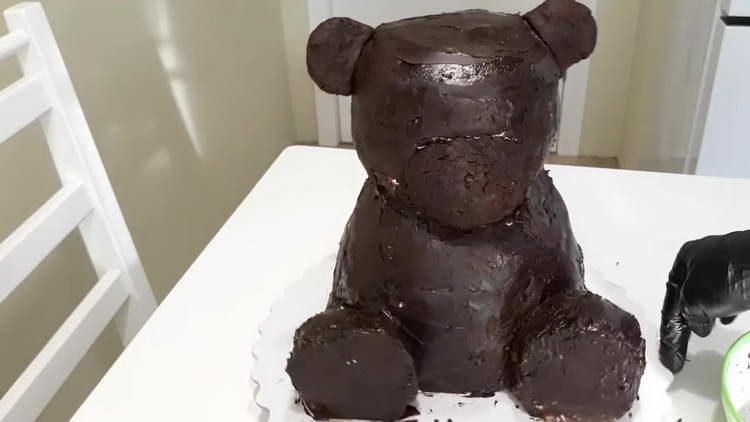
- Muzzle and ears are also coated with ganache.

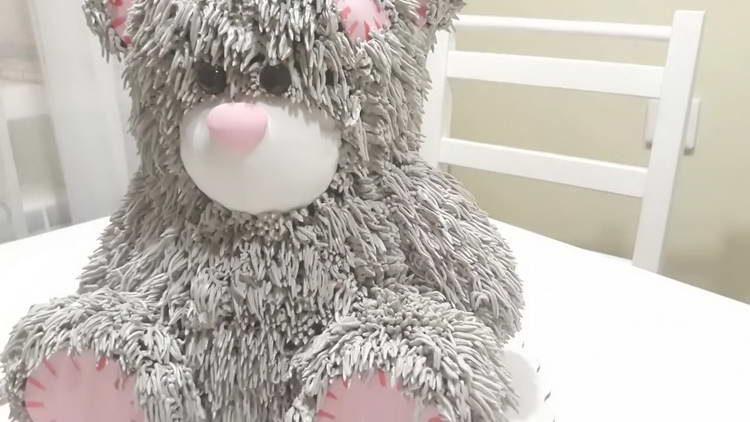
- We roll out white mastic (50 g) and make a muzzle out of it, smearing the joints at the junction with a brush dipped in water. From pink mastic (100 g) we cut out details for the legs, ears and patches on the bear's forehead. And from it we make a nose.

- We draw stitches with a gel dye and a brush.

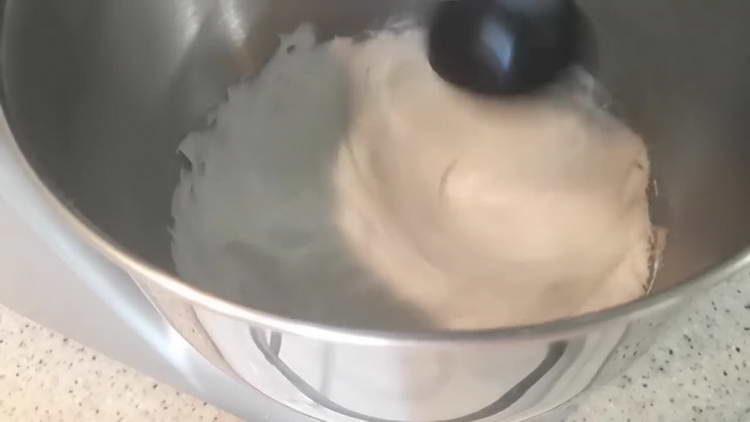
- We will use a protein-oil cream on the wool. To do this, mix 5 proteins with 150 g of sugar, put on a steam bath and heat to 60 degrees. Then set to whisk at maximum mixer speed. The mass should whip into a dense foam. To stabilize the protein, add a pinch of citric acid. Continue whipping until the proteins have cooled to room temperature. Then gradually add 400 g of butter with spoons, each time thoroughly whipping.
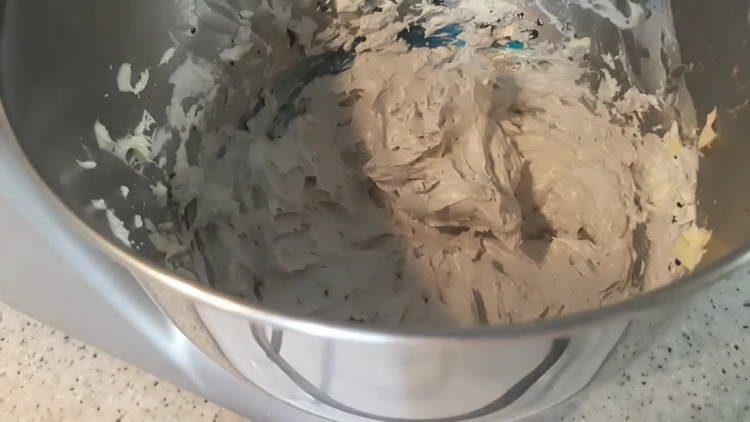
- The resulting cream is stained gray with gel dyes (a few drops of black and 1 drop of blue).
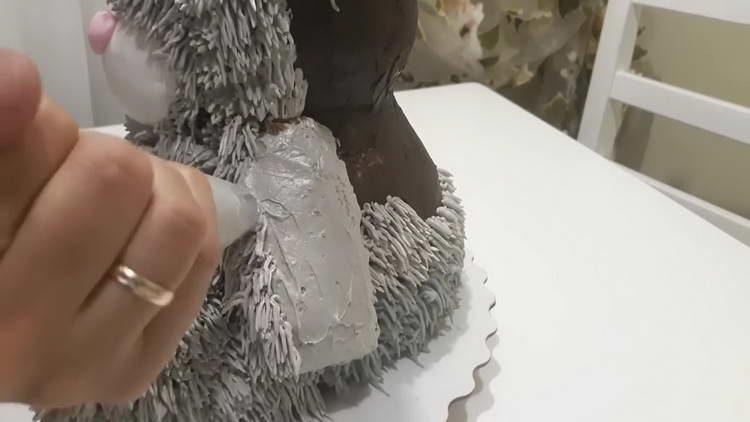
- We make wool with the help of a grass nozzle and a disposable pastry bag. We begin to plant the wool from the bottom, moving up. Then the wool will overlap, creating volume. We press the cream to the cake and sharply tear off at the length that we need.
- Coat the handles with cream and glue them to the body. Then also cover with wool.
- From black mastic (50 g) we roll up balls-eyes and glue them over the muzzle. The cake is ready.
Video recipe
This video shows in detail the entire process of assembling the cake "Bear" - from the preparation of cake layers to the outdoor decor.
From this article, you learned how real pastry masterpieces are created. Have you tried yourself as a pastry chef? Tell us about your successes and failures. And which cream do you think is most suitable for decoration?
