Cookware: thin long knife, cutting board, fish tweezers, paper towels, a small cup, parchment paper, container / pail with a lid.
Ingredients
| Name | amount |
| Salmon (large) | 1 PC. |
| Vegetable oil (olive) | 1 tbsp. l |
| Coarse salt | 2 tbsp. l |
| Granulated sugar | 1 tbsp. l |
Step cooking
Cut fillet
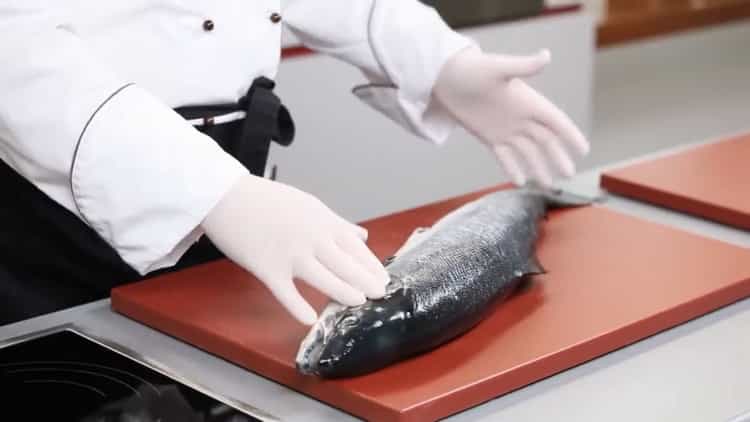
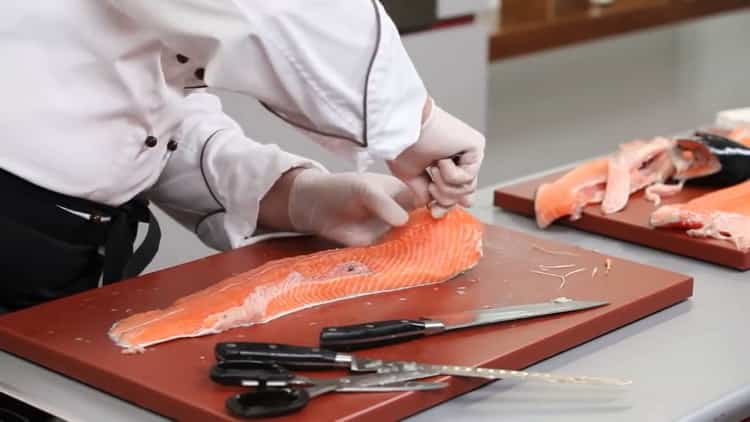
- At the salmon cleared of scales and gutted carcass, raise the front fin, introduce a thin knife at an angle and towards the head, cut the flesh to the ridge.

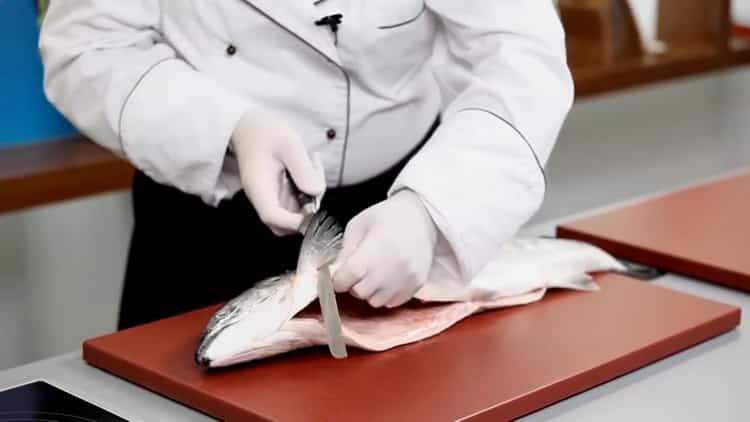
- Turn the carcass to the other side, carry out a similar operation from the other side of the fish, and cut off the head. In the place of the cut of the head, bring the knife under the first bone and cut the carcass along the ridge.
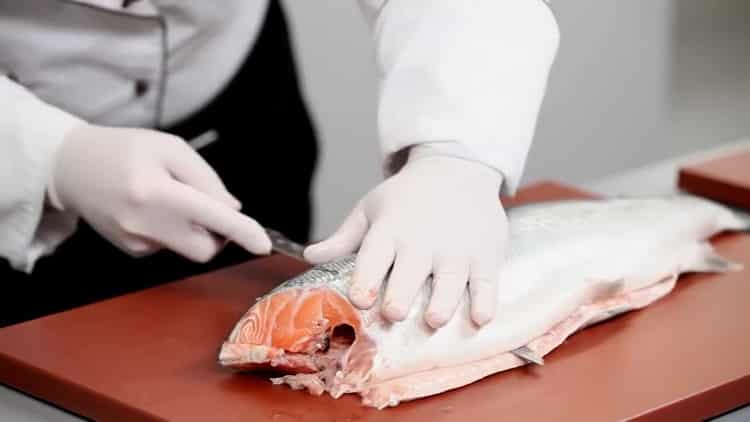
- Put the first resulting fillet aside. Again, bring the knife under the ridge remaining in the other half of the carcass, and cut off the remaining spinal bones. Pry off 4-5 costal bones with a knife, cutting from the flesh to the side of the abdomen, and cut off the teshu (tummy) with one movement. To carry out the same operation with the second filet.
- Remove the remaining bone in the fish flesh with fish tweezers. Bones are removed from the fillet with tweezers “in height”, starting from the head to the side of the tail.
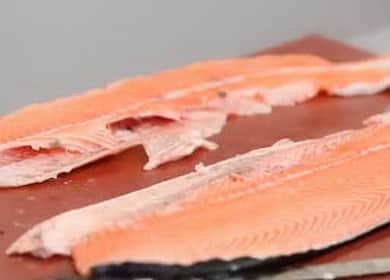
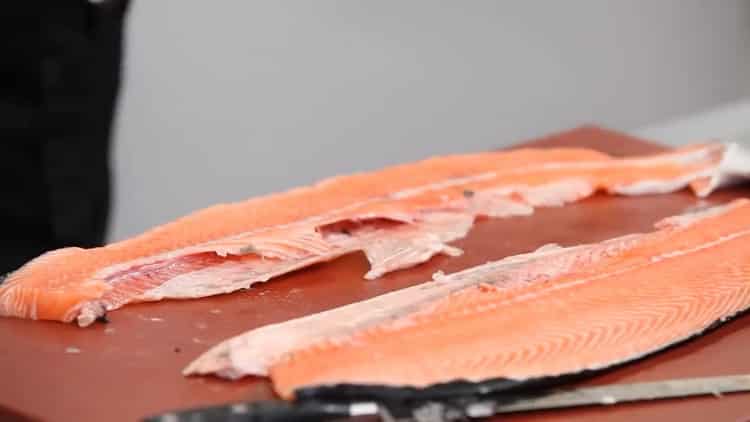
- Remove the central white strip from the fillet with a sharp knife. Cut the flesh from the skin, moving from the tail to the side of the head.
Salmon
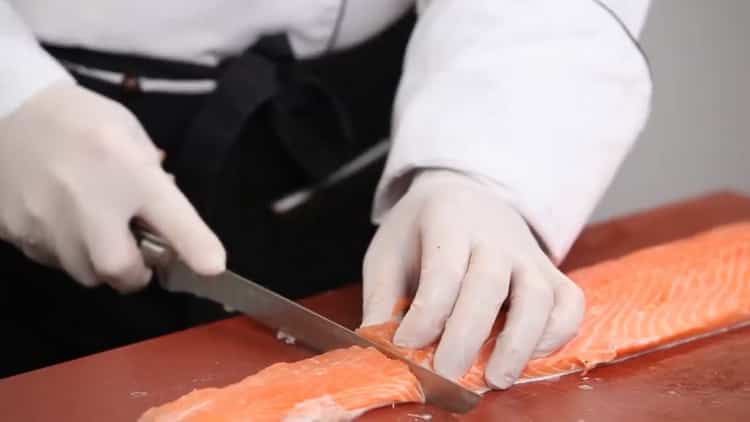
- Cut off the tail of the finished salmon fillet as the thinnest part of the fillet.
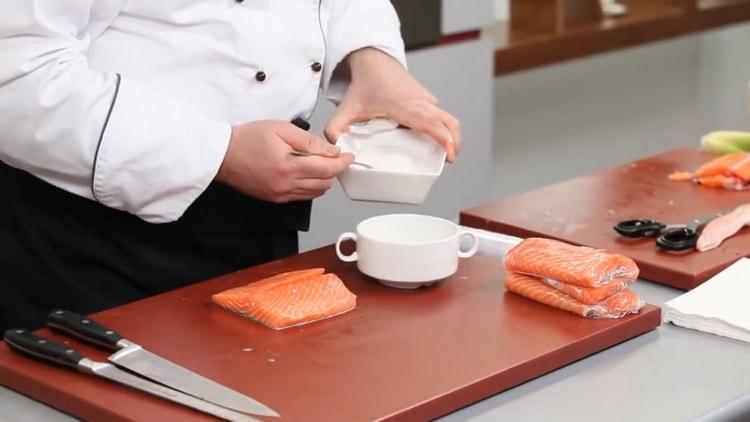
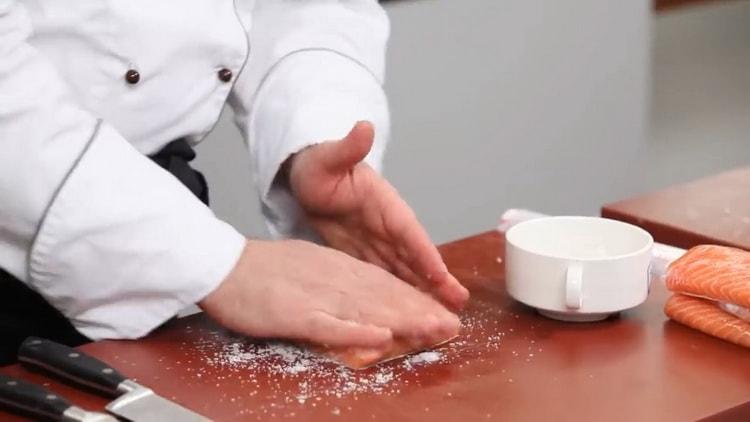
- Cut the remaining pulp into three equal parts and dry with paper towels. Apply a few drops of olive oil to each piece of fish pulp, and grind on the surface. Mix in a small cup 2 tbsp. l coarse salt with 1 tbsp. l granulated sugar.
- Apply a large pinch of sugar-salt mixture to each fish piece, and carefully, but carefully, so as not to damage the tissue, rub the fish into the pulp, salting from all sides.
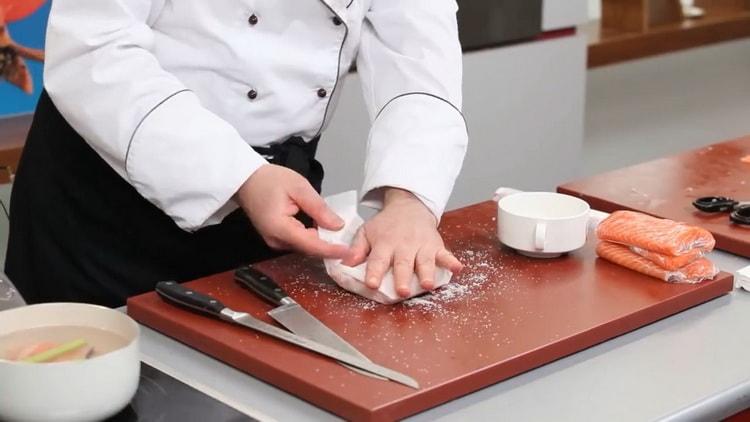
- Wrap each salted piece of salmon with parchment, put in a convenient pail with a lid and put in the refrigerator for a day.
Video recipe
An inimitable master class from the unrivaled chef Uriel Stern. See how simple the recipe and method for salting red fish is! A visual video lesson will allow you to instantly learn how to cook, and you will own many of the secrets of culinary art.
Thank you for paying attention to the recipe for salting red fish. What new and interesting did this guide give you? What innovations have you come across, and how useful was this recipe? How do you salt the fish at home? Perhaps you have a special secret to salting fish.
Other fish recipes
Fish fillet with gelatin with salmon
Sandwiches with red fish
Fish pie
Canned fish at home
